
Import Your Burble Logbook
If your dropzone uses Burble to track jumps, you can export your history from Burble and bring it into JumpTracker Pro instead of typing it in again. It’s also a quick way to set up a new dropzone. This guide walks through the import from start to finish.
Before you start
Section titled “Before you start”- Set up the location during the first import: you can add the dropzone and set up everything during the import, and the wizard guides you. This will be the cleanest and easiest way to set it up, and future imports will map automatically.
- If you already have a location set up: starting from scratch may make future imports much qucker. You can set up a new dropzone with a different name when you set up with the first burble import. You can leave your existing location and clean it up once you’re happy with the Burble import.
- Keep your Burble item codes the same: if you import again later, codes you have already mapped are matched automatically. Use your service’s info field to clarify what they are.
Get your file from Burble
Section titled “Get your file from Burble”You need Burble’s Transaction History export. It is a CSV file with four columns: Load, Date, Item and Amount.
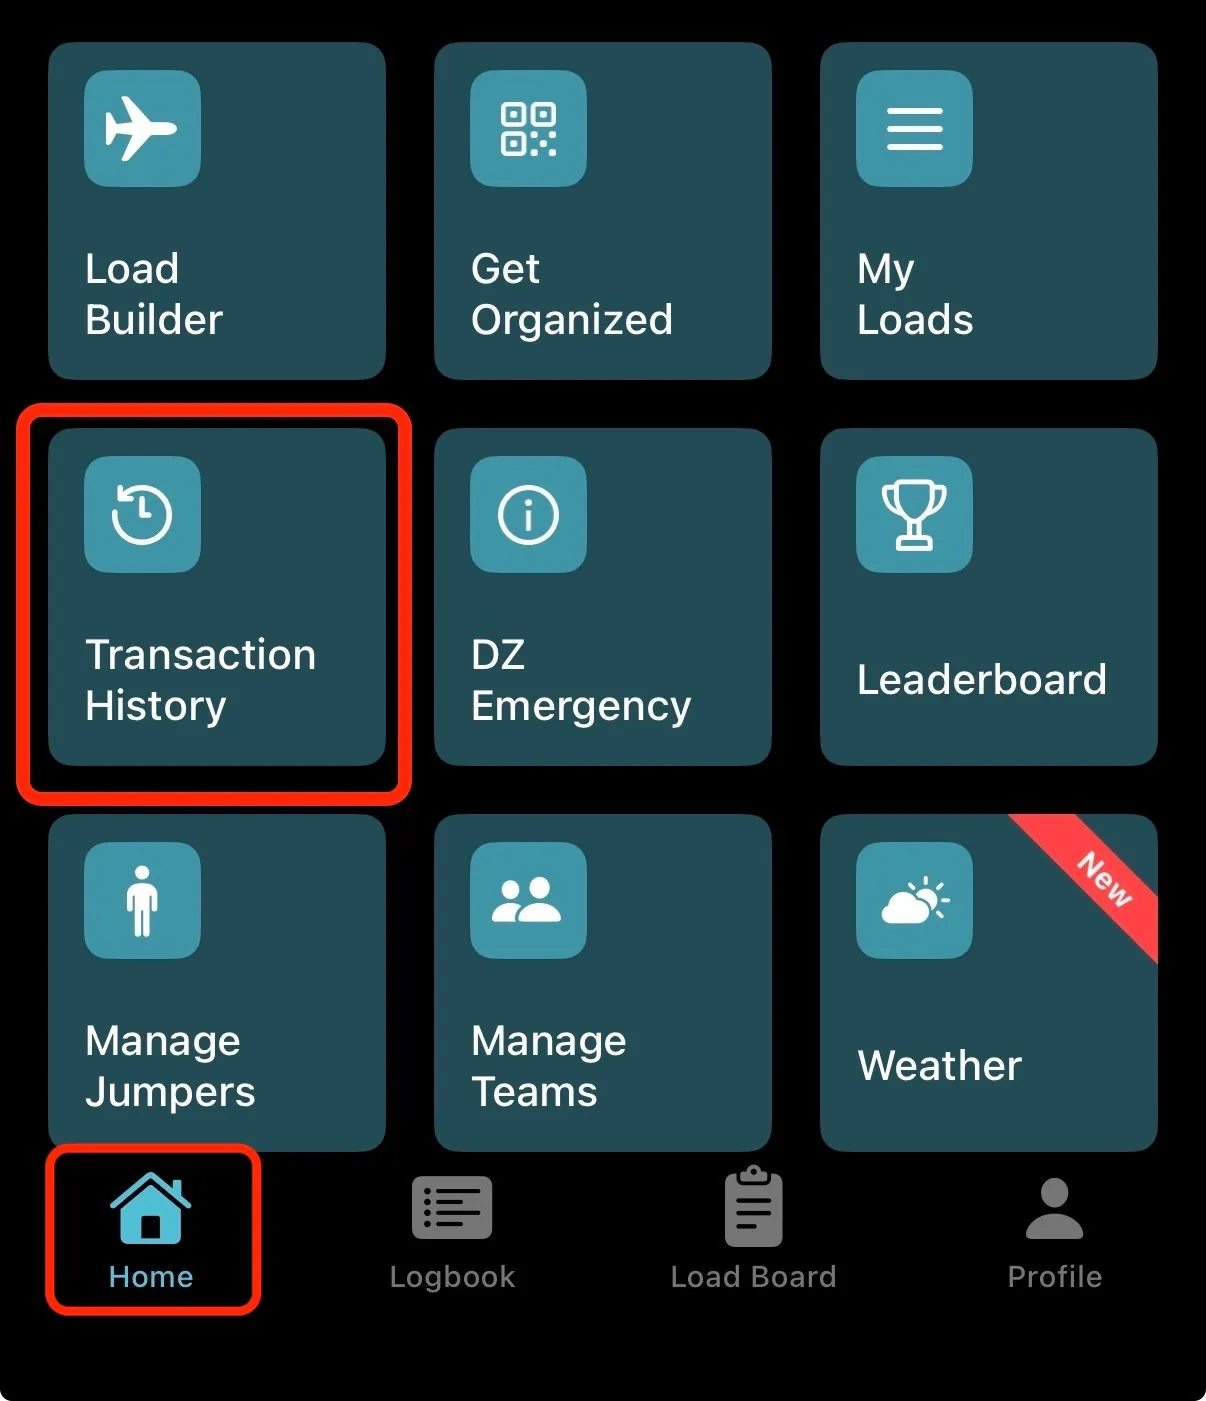
1. Open Transaction History. In the BurbleMe app on your phone, select your dropzone. From the Home screen, tap Transaction History.
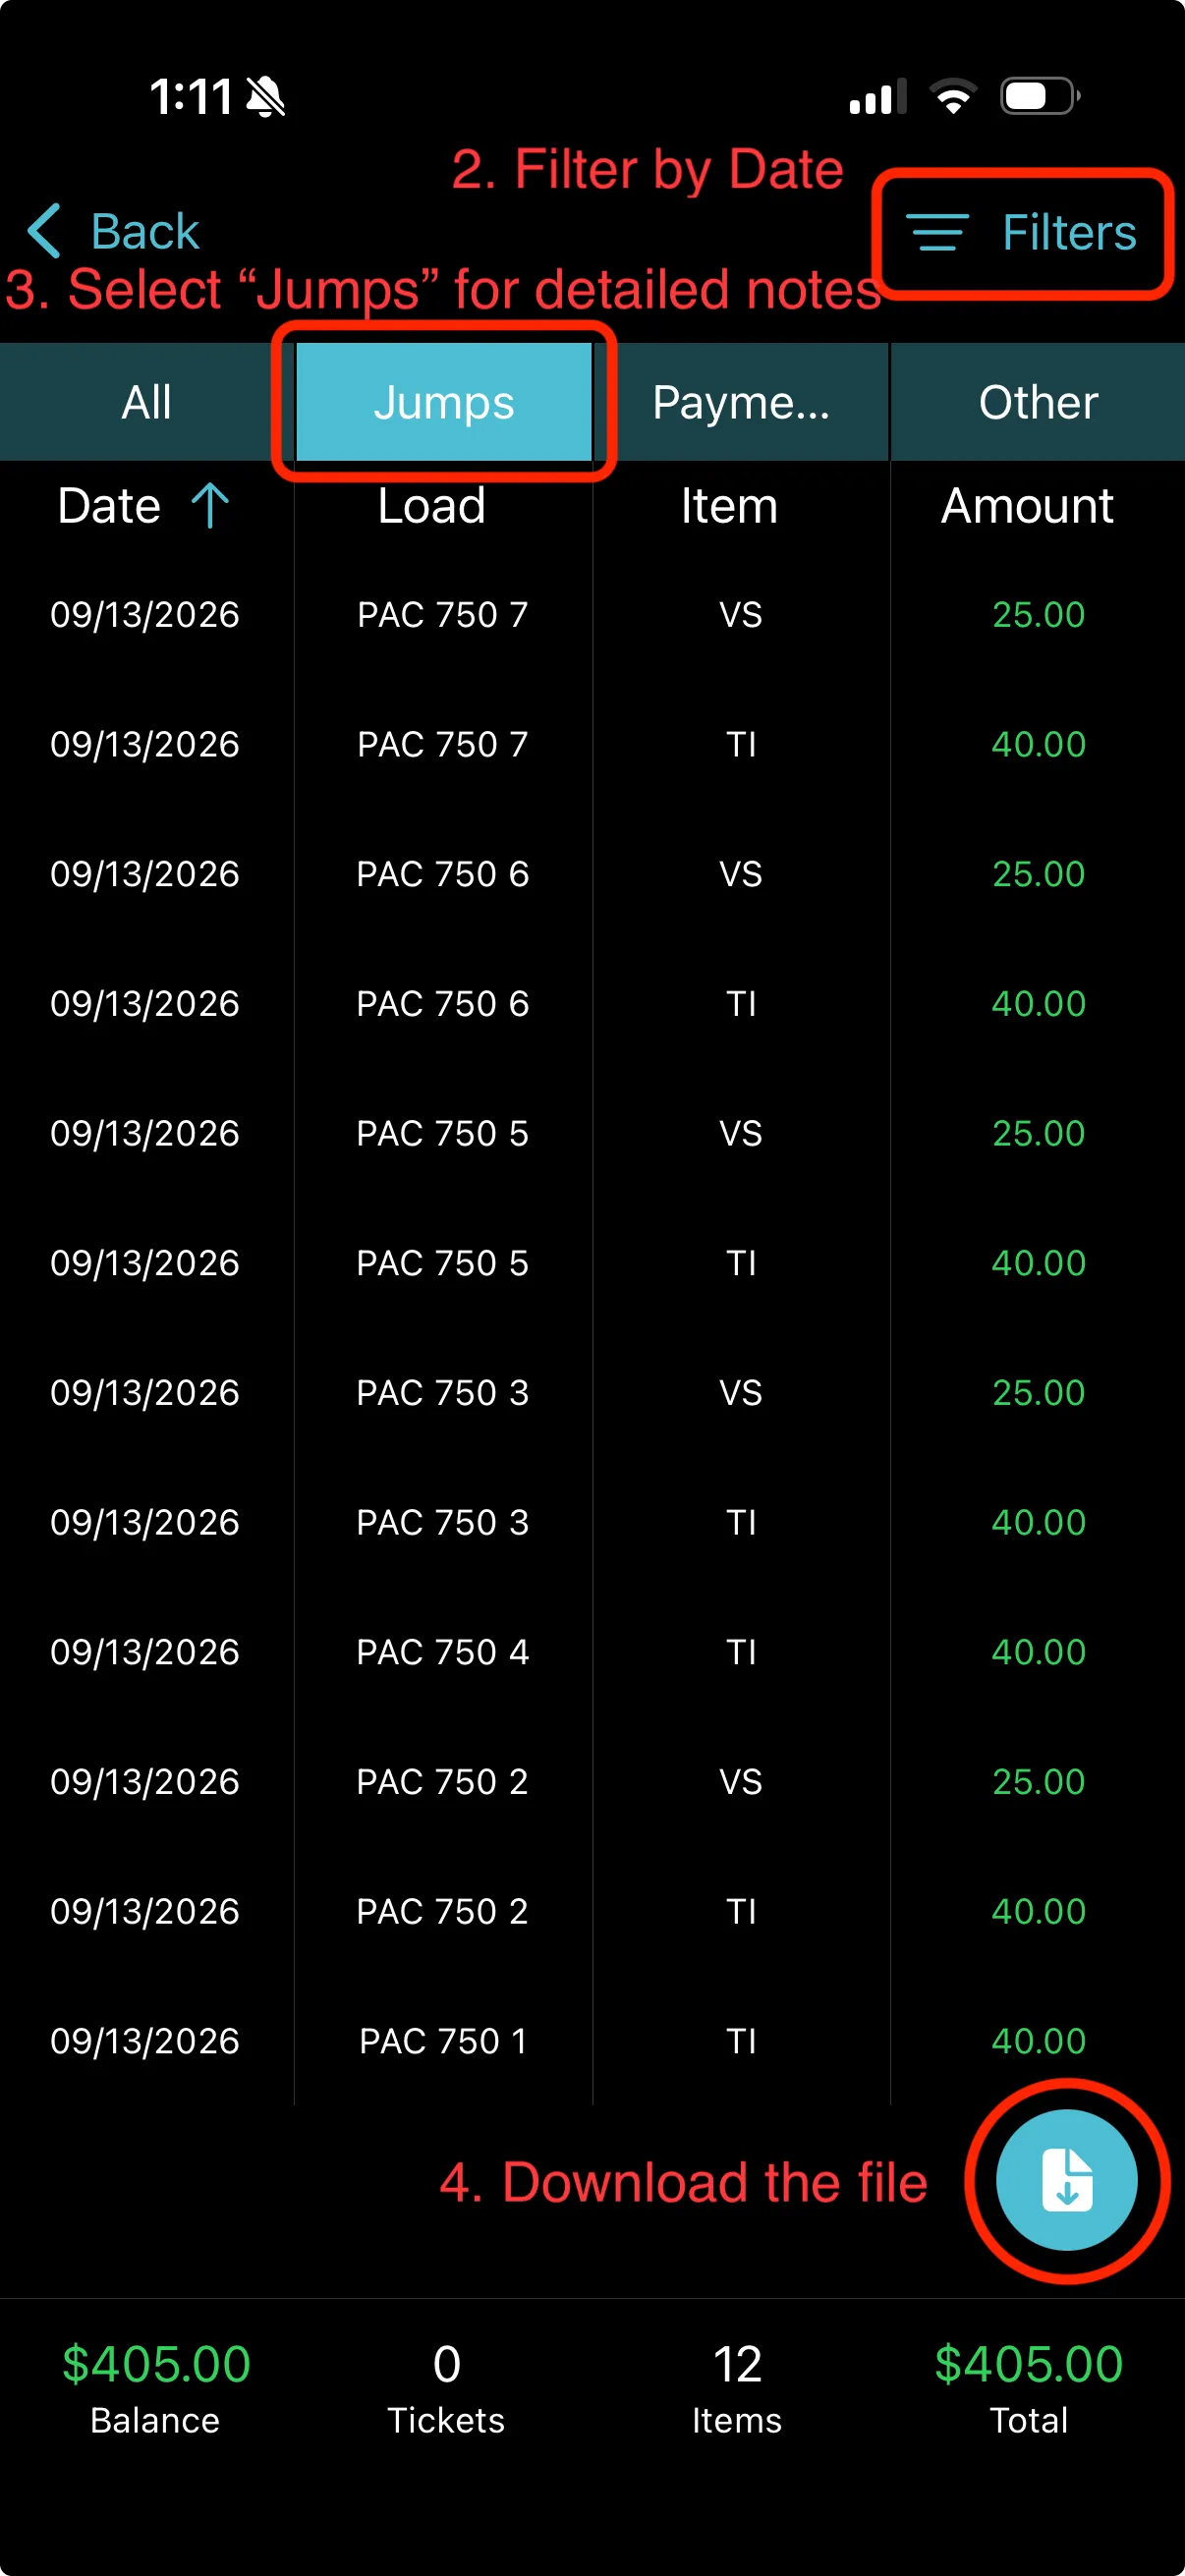
2. Filter by date. Tap Filters and choose the date range you want to import.
3. Choose a tab. Select Jumps if you want detailed notes to come across. Otherwise select the All tab.
4. Download the file. Tap the download button at the bottom right.
Start the import in JumpTracker Pro
Section titled “Start the import in JumpTracker Pro”- Open the Logbook page.
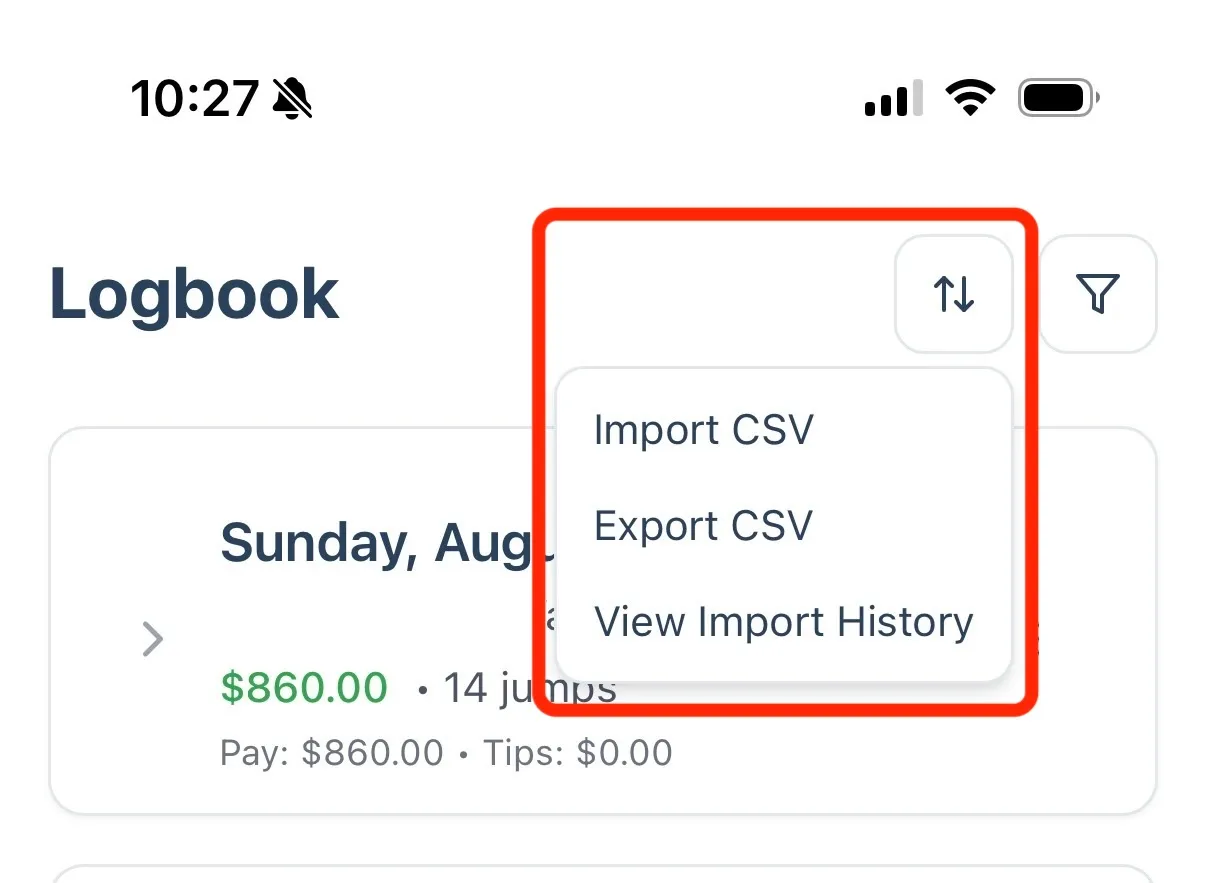
- Tap the import/export icon (the two arrows) at the top right and choose Import CSV.
- Choose Burble Transaction History as the source.
Then follow the import wizard through the steps presented.
Some Notes
Section titled “Some Notes”Payment Status
Section titled “Payment Status”Choosing the payment status for this batch: Paid or Pending, applies to every entry in the file. If some of your Burble entries were paid and others weren’t, import them as two separate files, or change individual entries afterward.
Amounts come straight from Burble
Section titled “Amounts come straight from Burble”For imports where the dropzone is already set up, the Amount in your file is imported as-is. JumpTracker Pro does not recalculate it from the rate you have set for that service. If your configured rate differs from what Burble paid, the imported entry keeps Burble’s number.
If this is the first time setup import, the services created will be set from Burble’s import file and future logging via the app will use those amounts.
If something looks wrong: undo
Section titled “If something looks wrong: undo”Every import is saved as a batch. To remove one:
- On the Logbook page, open the import/export menu and choose View Import History.
- Find the batch and choose undo. You will be asked to confirm.
Undo removes exactly the entries that import created. Two things to know:
- It cannot be reversed once you confirm it.
- Any services or categories the import created for you stay in your settings. Delete them there if you don’t want them.
What to check afterward
Section titled “What to check afterward”- If this is a first time setup import, go to your Settings page and double check that your new services have a properly defined service type and are set as variable if necessary. You can also add a memo about the service for a plain text description beyond an ambiguos burble code.